Article: 7 Mistakes You're Making with Your Garage Golf Simulator Setup (and How to Fix Them)

7 Mistakes You're Making with Your Garage Golf Simulator Setup (and How to Fix Them)
So, you’ve finally cleared out the dusty boxes, parked the SUV in the driveway, and decided to claim your territory. You’re building a golf simulator for garage use. It’s a rite of passage for the modern golfer. No more five-hour rounds behind a slow foursome; just you, a cold drink, and Pebble Beach in your pajamas.
But here’s the reality check: a garage is a hostile environment for golf technology. Between low rafters, concrete floors, and limited depth, it’s easy to turn a $10,000 investment into a very expensive room full of frustration. At Elevated Golf Simulators, we see the same "rookie moves" every week.
If you want to avoid the "indoor swing syndrome" or the heartbreak of a cracked driver, pay attention. Here are the 7 biggest mistakes people make when setting up a golf simulator for garage spaces: and exactly how to fix them.
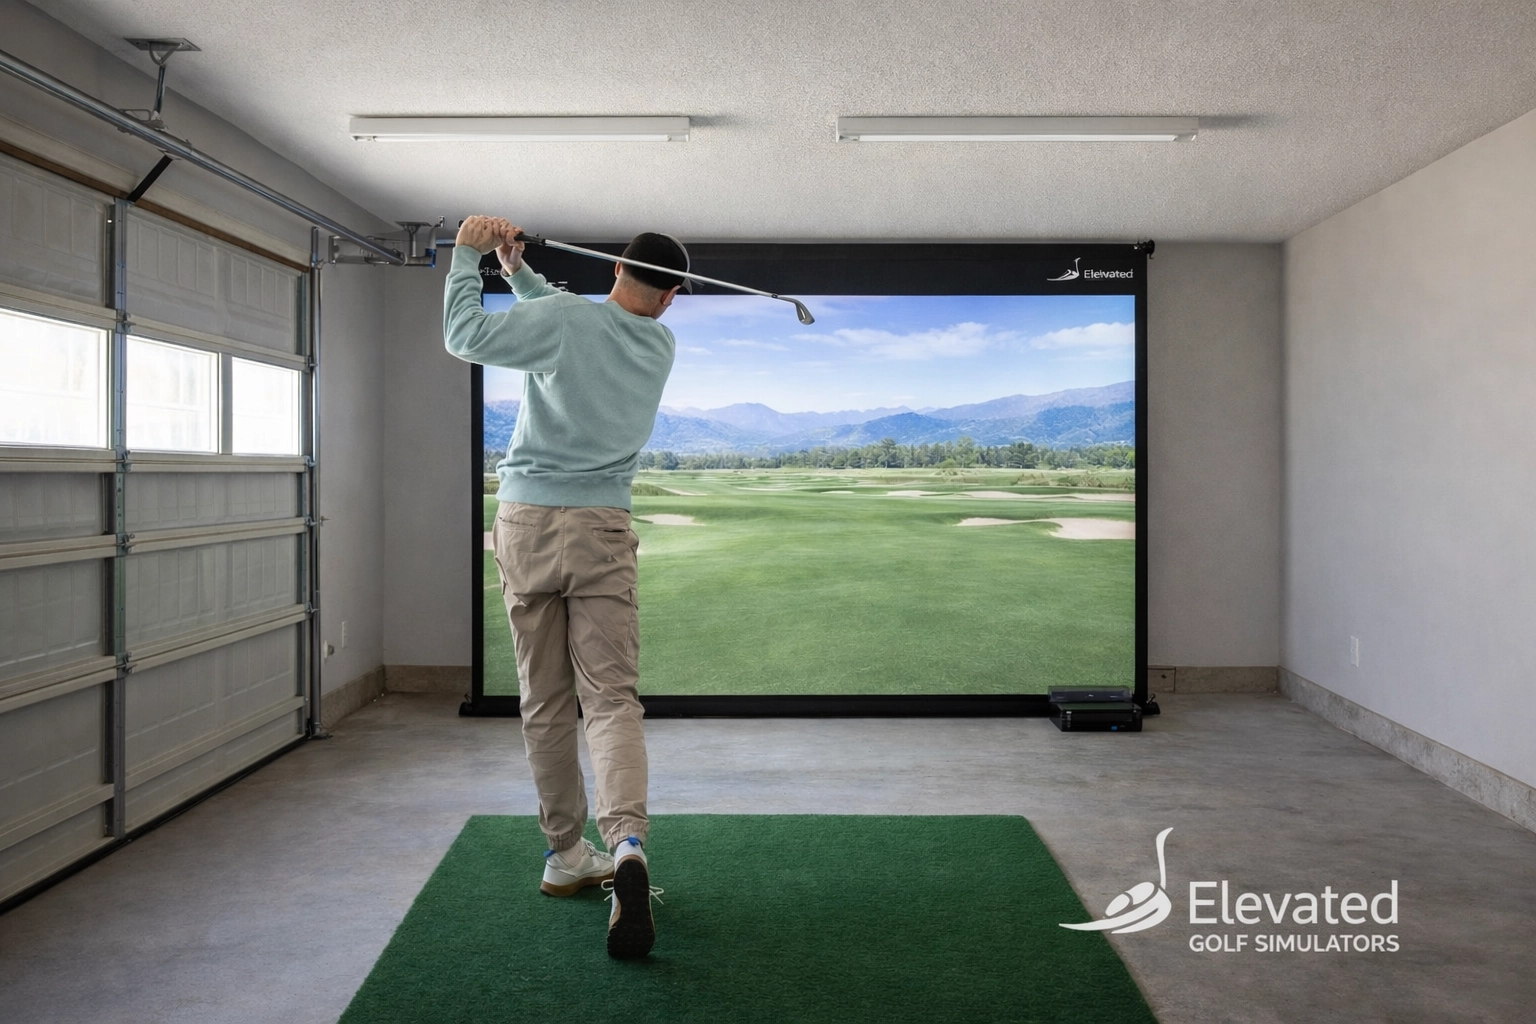
1. The "Ceiling Trap": Thinking 8 Feet is Enough
This is the number one mistake, hands down. You measure your garage ceiling and see 8.5 feet. "I'm 5'10"," you think, "that's plenty of room!"
The Mistake: You forgot about the arc of your driver and the "Indoor Swing Syndrome." When you know a ceiling is close, your brain subconsciously flattens your swing to avoid a collision. You’ll stop shifting your weight, shorten your follow-through, and develop a hitch that will ruin your real-world game. Plus, if you have a guest over who is 6’2”, they’re going to put a hole in your drywall (or worse, your club).
The Fix: You need a minimum of 9 feet, but 10 feet is the gold standard. If you’re stuck with low ceilings, consider "sloping" your setup or looking into "vaulting" a section of your garage ceiling if it’s an unfinished space.
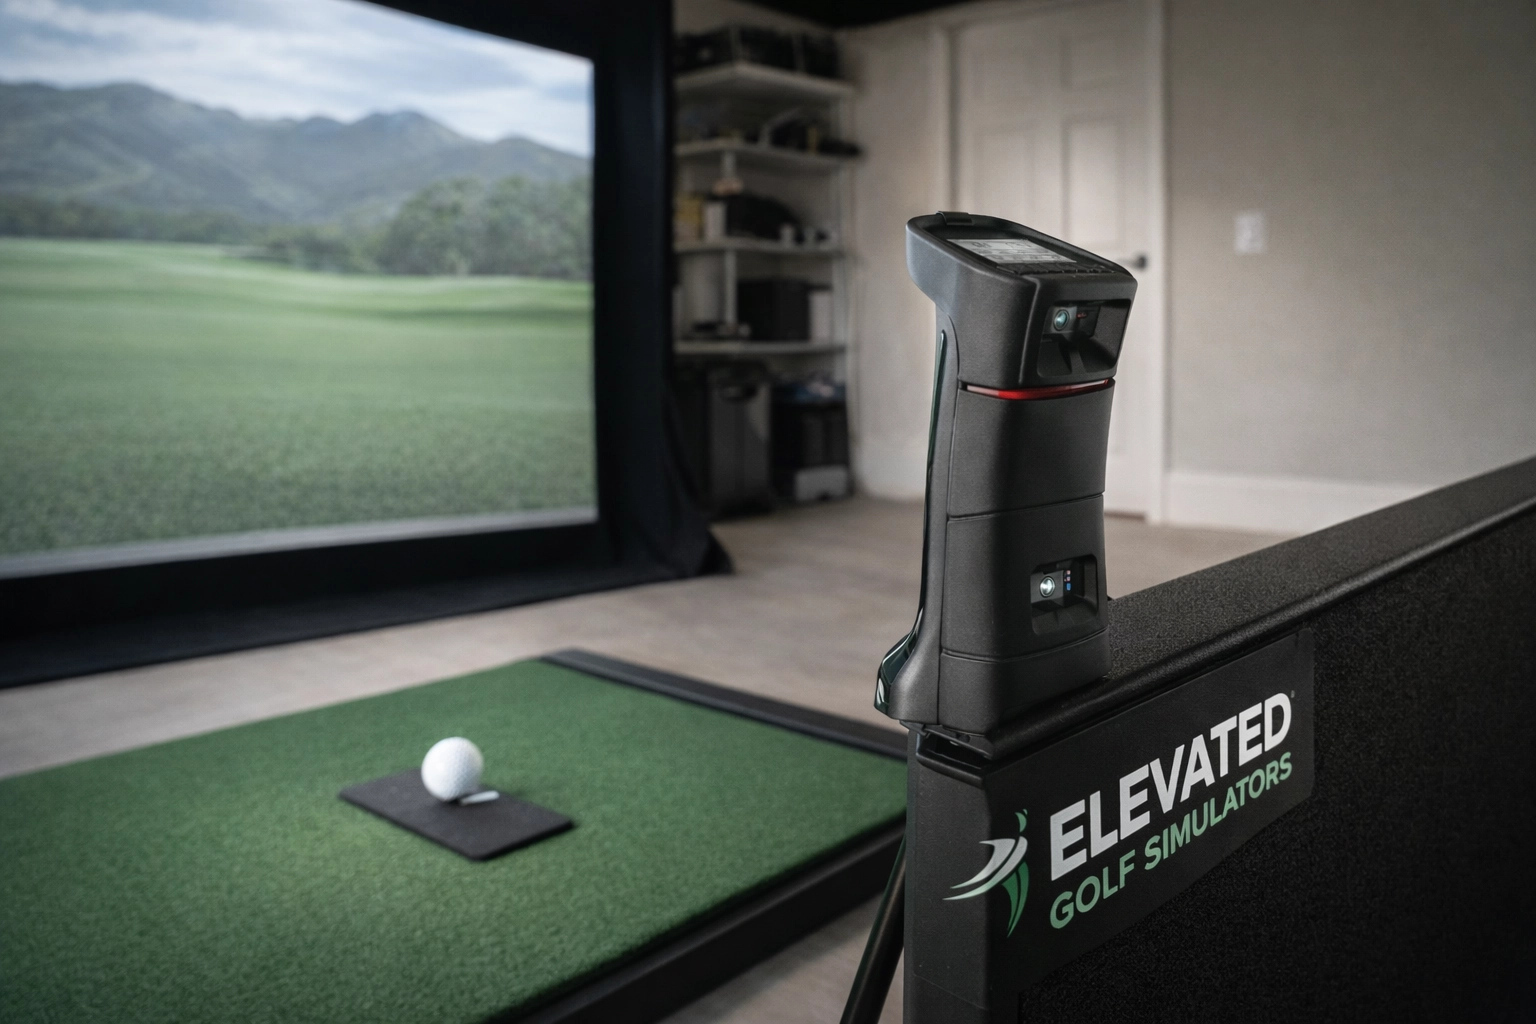
2. The Radar vs. Depth Disaster
Everyone loves the idea of a radar-based launch monitor like the Mevo+. They’re great units, but they have a massive appetite for space.
The Mistake: Buying a radar-based unit for a garage that only has 12–15 feet of total depth. Radar units need to sit about 7–8 feet behind the ball, and the ball needs at least 8–10 feet of flight time to hit the screen for the radar to read the spin accurately. If you don't have 18+ feet of total depth, your data is going to be wildly inconsistent.
The Fix: If your garage is "depth-challenged," go camera-based. Systems like the Uneekor EYE Mini or SkyTrak+ sit to the side of the ball. They only care about what happens at the moment of impact, meaning you can place your hitting mat much closer to the screen.
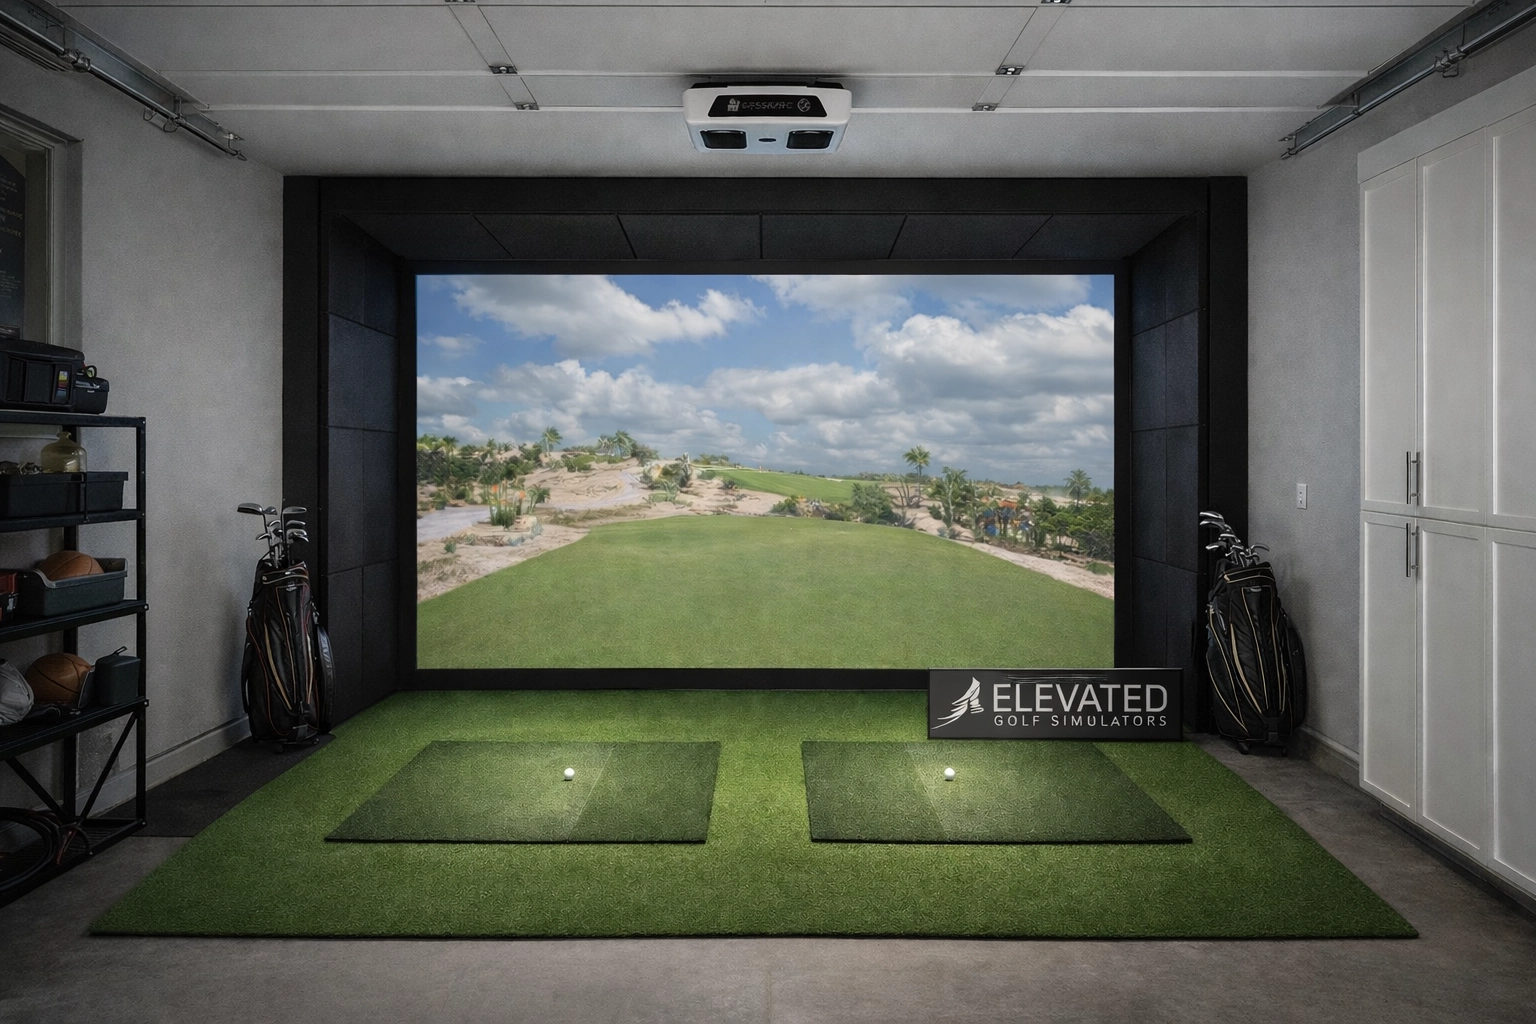
3. Width Woes: The "Coffin" Effect
We get it: garages are usually narrow. You might think 10 feet of width is enough because the screen is only 9 feet wide.
The Mistake: A 10-foot wide space feels like a coffin when you’re swinging a 45-inch driver. Not only do you risk hitting the side walls on your backswing, but you also have to deal with "offset" hitting. If the room is too narrow, you can't stand in the center; you have to stand closer to one side, which messes with your aim and your head.
The Fix: Aim for at least 12 feet of width. This allows for a centered hitting position, which is much more natural for your eyes and your brain. If you’re stuck at 10 feet, make sure your side walls are padded with acoustic foam or heavy curtains to prevent "rebound" disasters.
4. The "Leftie" Afterthought
You’ve spent weeks perfecting your right-handed setup. Then, your best friend (who is a lefty) comes over, and you realize he literally cannot play.
The Mistake: Setting up a side-mounted launch monitor in a way that only accommodates one golfer. Moving a SkyTrak back and forth across the mat every time you switch players is a recipe for a broken unit and a very long, annoying round of golf.
The Fix: If you plan on hosting "Lefty vs. Righty" matches, you need an Overhead Launch Monitor. Units like the Uneekor EYE XO2 are mounted to the ceiling. They track the hitting zone from above, meaning both lefties and righties can swing away without moving a single piece of equipment.
5. Projector Shadows: The "Head-in-the-Sun" Problem
You bought a great projector, you mounted it to the ceiling, you turned it on, and... there’s a giant shadow of your head right where the ball is supposed to be.
The Mistake: Using a standard-throw projector and mounting it too far back. If the projector is behind you, your body will block the light. It’s distracting, looks amateur, and makes it hard to see your data.
The Fix: Use a Short Throw Projector. These are designed to sit just a few feet away from the screen, usually in front of the golfer or directly above the hitting area. If you want a proven, high-end option, check out the BenQ LK936ST. For the best experience, check out our guide on The Best BenQ Projectors for Golf Simulators to find a model that eliminates shadows and delivers 4K clarity.

6. Aesthetic over Accuracy: The "Pro" Trap
We all want that "Tour Pro" look. You see a photo of a $50,000 commercial install and try to replicate it in your garage with a $2,000 budget.
The Mistake: Spending all your money on fancy turf and LED accent lights, while skimping on the Simulation PC or the launch monitor. Or worse, buying an overhead unit because it looks "cool," even though your ceiling is too low to mount it safely.
The Fix: Prioritize the "Big Three": Accuracy, Safety, and Software. A simulator that looks like a dungeon but gives you Tour-level data is better than a beautiful room that tells you every drive went 300 yards straight when you actually sliced it into the neighbor's yard. Make sure your PC can handle the physics of the Simulation Software you choose.
7. The "Someday" Setup
"I’ll buy the cheap mat now and upgrade to the professional one later."
The Mistake: Using a thin, cheap mat on a concrete garage floor. This is the fastest way to develop "golfer’s elbow" or wrist injuries. Concrete is unforgiving. If your mat doesn't have proper dampening, your joints will pay the price within a month of daily practice.
The Fix: Don't skimp on the mat. Build for the garage you have today. Get a high-quality hitting strip that mimics real turf and absorbs shock. If you're building a DIY enclosure, make sure it's sturdy enough to handle a 120mph ball speed now, not when you "get better."
Bonus Fix (Garage-Friendly): Sportscreen Vanish Retractable Enclosure = “Now You See It, Now You Don’t”
If Mistake #7 for you is really losing your garage utility (you still need to park cars, store bikes, or use the space as a workshop), a permanent enclosure can feel like a non-starter.
The Fix: Consider the Sportscreen Vanish retractable enclosure. It’s a clean, professional-looking setup that can disappear when you’re done—so your garage goes right back to being a garage.
Why it’s perfect for homeowners:
- Retracts out of the way when you’re not playing (true “now you see it, now you don’t” convenience)
- Lets you run a high-end screen + enclosure experience without sacrificing daily function
- Ideal for shared garages where the simulator can’t live “always-on” 24/7
Quick Comparison: Choosing Your Garage Setup
| Feature | Radar (e.g., Mevo+) | Camera (e.g., Eye Mini) | Overhead (e.g., EYE XO) |
|---|---|---|---|
| Best For | Large Garages (18ft+ depth) | Small/Medium Garages | Multi-player (L/R) |
| Space Required | High | Low | Medium |
| Accuracy | High (with enough flight) | Very High | Elite |
| Portability | Excellent | Good | None (Fixed) |
Final Verdict: Don't Guess, Measure Twice
Building a golf simulator for garage use is the ultimate home improvement project, but it requires precision. If you’re feeling overwhelmed by throw ratios, ceiling heights, and "lefty-friendly" configurations, don't sweat it.
At Elevated Golf Simulators, we don't just sell boxes; we provide expert advice to make sure you don't make these expensive mistakes. Plus, we offer free shipping on all major units and packages to help you get your dream setup through the door.
Ready to stop guessing and start swinging?
Check out our 2026 Ultimate Buying Guide for a deep dive into the best tech on the market, or browse our Overhead Launch Monitors to solve your lefty problems once and for all.
Avoid the headaches, save your ceiling, and let’s get you on the first tee( right there in your garage.)
